--DDL : auto commit;
CREATE TABLE PERSISTENT_LOGINS(
    USERNAME VARCHAR2(200),
    SERIES VARCHAR2(200),
    TOKEN VARCHAR2(200),
    LAST_USED DATE,
    CONSTRAINT PK_PL PRIMARY KEY(SERIES)
);
security-context.xml
</security:http> 안의 로그아웃 정보 변경
data-source-ref - db 연결하는 정보와 연결함
security:logout 에서 delete-cookies를 설정 security:remember-me에서 DB 정보 기입 후 쿠키 유효시간 설정 => 자동으로 PERSISTENT_LOGINS 테이블에 들어감(테이블의 이름과 컬럼 갯수 등 수정하면 안 됨. 자체적으로 제공해주는 기능이기에 그대로 사용해야함)
<!-- dataSource를 통해 지정한 Database의
약속된 테이블(persistent_logins) 를 이용하여 기존 로그인 정보를 기록함

token-validity-seconds : 쿠키의 유효시간(초) 7일로 설정
-->
<security:remember-me data-source-ref="dataSource"
    token-validity-seconds="604800"
/>

<!-- 로그아웃 처리를 위한 URI를 지정하고, 로그아웃한 후에 세션을 무효화(session.invalidate())함
/logout : post방식 요청URI -> form의 action="/logout"에서 사용

로그아웃을 하면 자동 로그인에 사용된 쿠키도 함께 삭제해 줌.
-->
<security:logout logout-url="/logout" invalidate-session="true"
    delete-cookies="remember-me,JSESSION_ID" />
<!-- 스프링 시큐리티 애너테이션을 활성화
- pre-post-annotations="enabled" -> 골뱅이PreAuthorize, 골뱅이PostAuthorize 활성화
  *** PreAuthorize : 특정 메소드를 실행하기 전에 role 체킹
  PostAuthorize : 특정 메소드를 실행한 후에 role 체킹
- secured-annotations="enabled" -> 골뱅이Secured를 활성화
  Secured : 스프링 시큐리티 모듈을 지원하기 위한 애너테이션
-->
<security:global-method-security pre-post-annotations="enabled"
    secured-annotations="enabled"/>
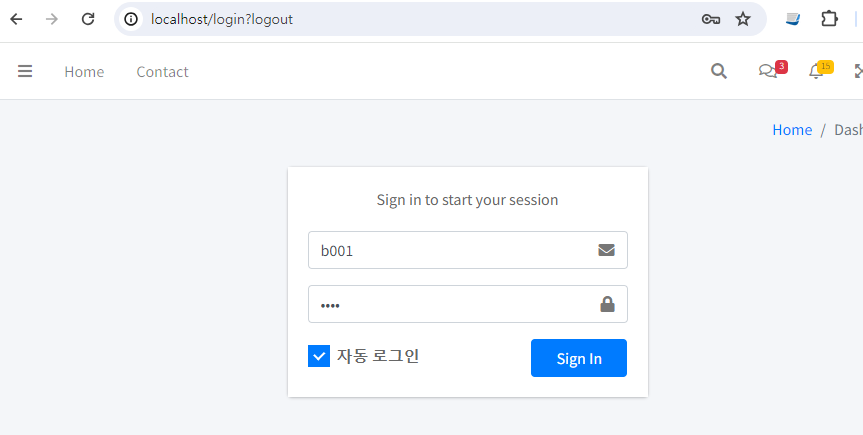
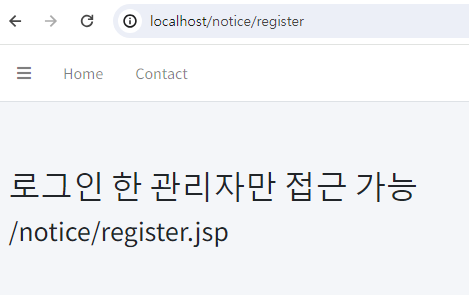
결과 화면3 : http://localhost/board/register로 입력 시 로그인 화면이 뜸
관리자만 접근
NoticeController.java
@PreAuthorize 추가
package kr.or.ddit.controller;

import org.springframework.security.access.prepost.PreAuthorize;
import org.springframework.stereotype.Controller;
import org.springframework.web.bind.annotation.GetMapping;
import org.springframework.web.bind.annotation.RequestMapping;

import lombok.extern.slf4j.Slf4j;

@RequestMapping("/notice")
@Slf4j
@Controller
public class NoticeController {

	//요청 URI : /notice/list
	@GetMapping("/list")
	public String list() {
		//forwarding : jsp
		return "notice/list";
	}

	//요청 URI : /notice/register
	@PreAuthorize("hasRole('ROLE_ADMIN')")
	@GetMapping("/register")
	public String register() {
		//forwarding : jsp
		return "notice/register";
	}
}
register.jsp
<%@ page language="java" contentType="text/html; charset=UTF-8"%>
<%@ taglib prefix="c" uri="http://java.sun.com/jsp/jstl/core" %>
<%
//request객체 안에 있는 쿠키들을 확인
Cookie[] cookies = request.getCookies();

out.print("<p>쿠키의 개수 : " + cookies.length + "</p>");

for(int i =0;i<cookies.length;i++){
   out.print(cookies[i].getName()+":"+cookies[i].getValue()+"<br/>");
}
%>

<h2>로그인 한 관리자만 접근 가능</h2>
<h3>/notice/register.jsp</h3>
결과 화면4-1
결과 화면4-2
예시
BookController.java
하단의 셋 중에 하나 사용 가능
@PreAuthorize("hasRole('ROLE_ADMIN') or hasRole('ROLE_MEMBER')")
@PreAuthorize("hasAnyRole('ROLE_ADMIN','ROLE_MEMBER')")
@Secured({"ROLE_ADMIN","ROLE_MEMBER"})
package kr.or.ddit.controller;

import java.util.HashMap;
import java.util.List;
import java.util.Map;

import org.springframework.beans.factory.annotation.Autowired;
import org.springframework.security.access.annotation.Secured;
import org.springframework.security.access.prepost.PreAuthorize;
import org.springframework.stereotype.Controller;
import org.springframework.ui.Model;
import org.springframework.web.bind.annotation.GetMapping;
import org.springframework.web.bind.annotation.PostMapping;
import org.springframework.web.bind.annotation.RequestBody;
import org.springframework.web.bind.annotation.RequestMapping;
import org.springframework.web.bind.annotation.RequestMethod;
import org.springframework.web.bind.annotation.RequestParam;
import org.springframework.web.bind.annotation.ResponseBody;
import org.springframework.web.servlet.ModelAndView;


import kr.or.ddit.service.BookService;
import kr.or.ddit.utils.ArticlePage;
import kr.or.ddit.vo.BookVO;
import lombok.extern.slf4j.Slf4j;

@Slf4j
@Controller
public class BookController {

	// 요청URI : /create
	// 요청 파라미터 :
	// 요청방식 : get
	// 로그인(인증) 한 관리자 또는 회원(인가)만 접근 가능
//	@PreAuthorize("hasRole('ROLE_ADMIN') or hasRole('ROLE_MEMBER')")
//	@PreAuthorize("hasAnyRole('ROLE_ADMIN','ROLE_MEMBER')")
	@Secured("{'ROLE_ADMIN','ROLE_MEMBER'}")
	@RequestMapping(value = "/create", method=RequestMethod.GET)
	public ModelAndView create() {
		ModelAndView mav = new ModelAndView();

		// name : title / value = "도서생성"
		mav.addObject("title", "도서생성");
		// jsp
		mav.setViewName("book/create");

		return mav;
	}

}
결과 화면5-1 : http://localhost/create 로 들어가서 로그인
결과 화면5-2
로그인 해야 메소드 접근 가능
EmployeeController.java
class 밖에 추가
// 이 클래스의 모든 메소드에 접근하려면 로그인 된 상태여야 함
@PreAuthorize("isAuthenticated()")
결과 화면6-1 : http://localhost/employee/create로 들어올 시 화면
결과 화면6-2 : 로그인 한 후 화면
1. 공지사항 등록 - 로그인 한 관리자만 접근 가능 골뱅이PreAuthorize("hasRole('ROLE_ADMIN')") 골뱅이PreAuthorize("hasRole('ROLE_ADMIN') or hasRole('ROLE_MEMBER')")
2. 공지사항 등록 - 로그인(인증) 한 관리자 또는 회원(인가)만 접근 가능 골뱅이PreAuthorize("hasAnyRole('ROLE_ADMIN','ROLE_MEMBER')") 골뱅이Secured({"ROLE_MEMBER","ROLE_ADMIN"})
3. 공지사항 등록 - 로그인(인증) 한 관리자 이면서 회원(인가)만 접근 가능 골뱅이PreAuthorize("hasRole('ROLE_ADMIN') and hasRole('ROLE_MEMBER')")
4. 로그인한 사용자만 접근 가능(권한과 상관 없음) 골뱅이PreAuthorize("isAuthenticated()")
5. 로그인 안 한 사용자가 접근 가능 -> 로그인 한 사용자는 접근 불가 골뱅이PreAuthorize("isAnonymous()")
<!-- 사용자가 정의한 로그인 페이지의 URI를 지정함
사용자 정의 로그인 성공 처리자를 지정함 -->
<security:form-login login-page="/login"
    authentication-success-handler-ref="customLoginSuccess"/>
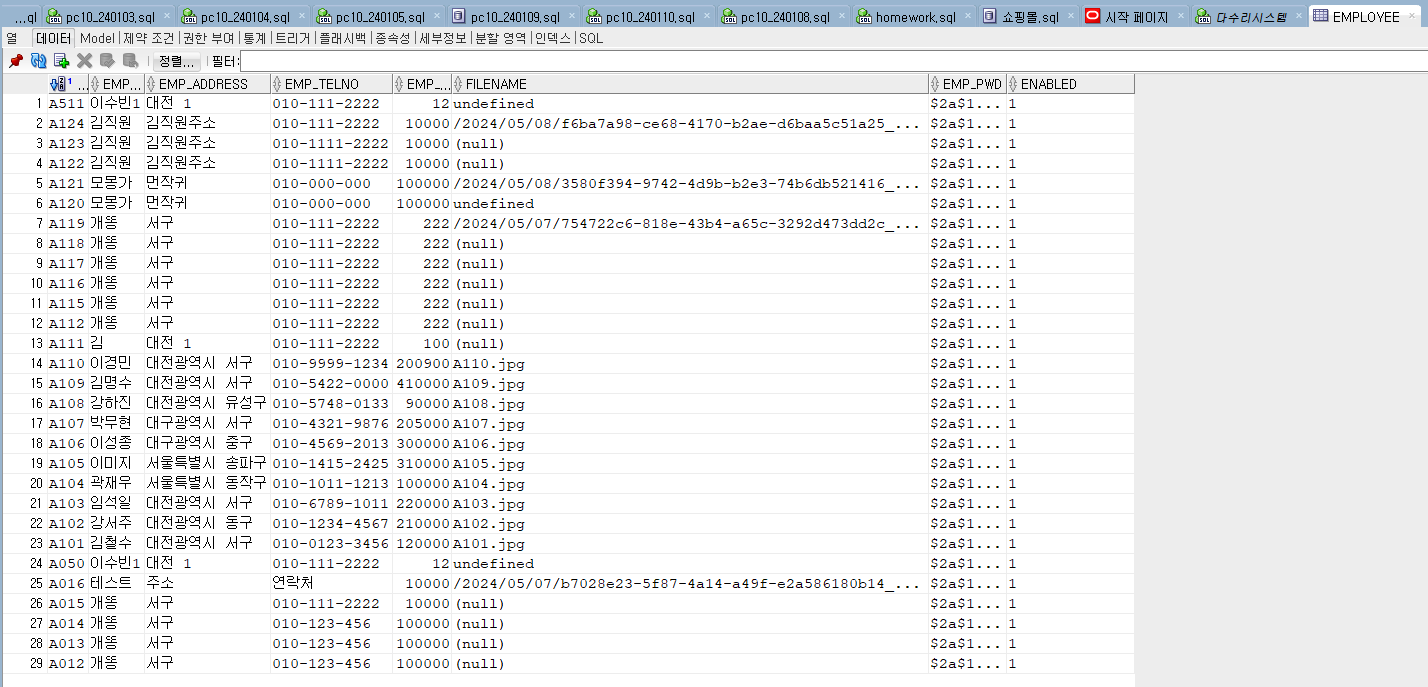
INSERT INTO USERS(USERNAME,PASSWORD)
SELECT EMP_NO, 'java' FROM EMPLOYEE;
COMMIT;
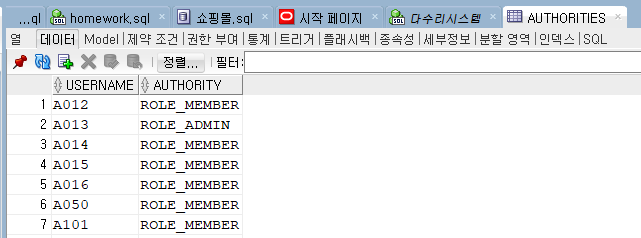
INSERT INTO AUTHORITIES(USERNAME,AUTHORITY)
SELECT EMP_NO, 'ROLE_MEMBER' FROM EMPLOYEE;
COMMIT;
데이터 잘 들어갔는지 확인
SELECT A.USERNAME, A.PASSWORD, A.ENABLED
, B.USERNAME, B.AUTHORITY
FROM USERS A, AUTHORITIES B
WHERE A.USERNAME = B.USERNAME;
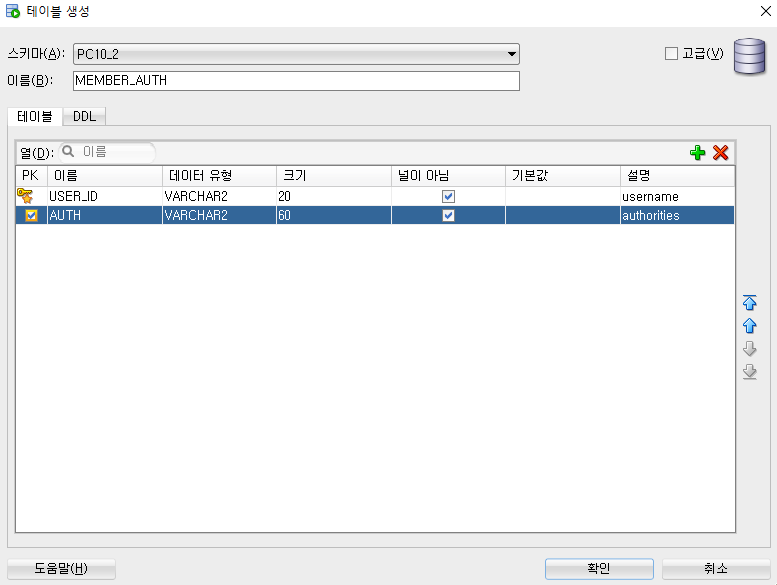
INSERT INTO MEMBER_AUTH(USER_ID,AUTH)
SELECT USER_ID,'ROLE_MEMBER'
FROM MEMBER;
COMMIT;
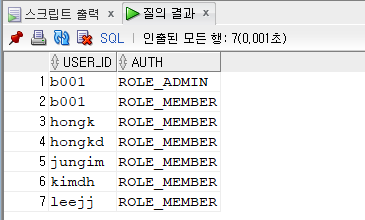
SELECT * FROM MEMBER_AUTH;
결과 화면8
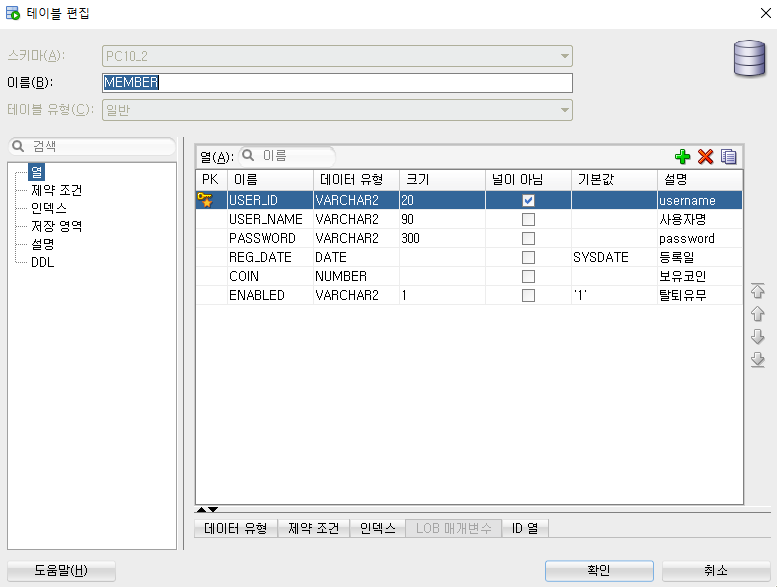
SELECT A.USER_ID, A.USER_NAME, A.PASSWORD, A.REG_DATE, A.COIN, A.ENABLED
, B.AUTH
FROM MEMBER A, MEMBER_AUTH B
WHERE A.USER_ID = B.USER_ID
AND A.USER_ID = 'b001';
결과 화면9 : 암호화한 비밀번호로 PASSWORD에 넣어야 함
security-context.xml
<?xml version="1.0" encoding="UTF-8"?>
<beans xmlns="http://www.springframework.org/schema/beans"
xmlns:xsi="http://www.w3.org/2001/XMLSchema-instance"
xmlns:security="http://www.springframework.org/schema/security"
xsi:schemaLocation="http://www.springframework.org/schema/security http://www.springframework.org/schema/security/spring-security.xsd
http://www.springframework.org/schema/beans http://www.springframework.org/schema/beans/spring-beans.xsd">
<!-- CustomAccessDeniedHandler customAccessDenied = new CustomAccessDeniedHandler(); 와 같은 문장임 -->
<bean id="customAccessDenied"
class="kr.or.ddit.security.CustomAccessDeniedHandler"></bean>
<bean id="customLoginSuccess" class="kr.or.ddit.security.CustomLoginSuccessHandler"></bean>
<!-- 비밀번호 암호화 처리글 -->
<bean id="passwordEncoder"
class="org.springframework.security.crypto.bcrypt.BCryptPasswordEncoder"></bean>
<!-- 스프링 시큐리티의 UserDetailsService를 구현한 클래스를 빈으로 등록함 -->
<bean id="customUserDetailsService2" class="kr.or.ddit.security.CustomUserDetailsService2">
</bean>
<security:http>
<!-- URI 패턴으로 접근 제한을 설정함 -->
<!-- URL을 가로챔 -->
<!-- 누구나 접근 가능 -> 생략 가능 -->
<security:intercept-url pattern="/board/list" access="permitAll"/> <!-- permitAll : 누구나 접근 가능 -->
<security:intercept-url pattern="/board/register" access="hasRole('ROLE_MEMBER')" /> <!-- ROLE_MEMBER 권한을 가졌을 때 : 회원만 접근 -->
<security:intercept-url pattern="/notice/list" access="permitAll" />
<security:intercept-url pattern="/notice/register" access="hasRole('ROLE_ADMIN')" /> <!-- ROLE_ADMIN 권한을 가졌을 때 : 관리자만 접근 -->
<!-- 사용자가 정의한 로그인 페이지의 URI를 지정함
사용자 정의 로그인 성공 처리자를 지정함
/login : get방식 -> LoginController에서 매핑 -->
<security:form-login login-page="/login"
authentication-success-handler-ref="customLoginSuccess"/>
<!-- 등록한 사용자 정의 bean을 접근 거부 처리자로 지정함 -->
<security:access-denied-handler ref="customAccessDenied"/>
<!-- 로그아웃 처리를 위한 URI를 지정하고, 로그아웃한 후에 세션을 무효화(session.invalidate())함
/logout : post방식 요청URI -> form의 action="/logout"에서 사용 -->
<security:logout logout-url="/logout" invalidate-session="true" />
</security:http>
<security:authentication-manager>
<!-- 지정된 아이디와 패스워드로 로그인이 가능하도록 설정함 -->
<security:authentication-provider user-service-ref="customUserDetailsService2"> <!-- 인증 제공자 -->
<!-- 비밀번호 암호화 -->
<security:password-encoder ref="passwordEncoder"/>
</security:authentication-provider>
</security:authentication-manager>
</beans>
		<!-- 스프링 시큐리티 설정을 도와줌 -->
		<!-- https://mvnrepository.com/artifact/org.springframework.security/spring-security-config -->
		<dependency>
		    <groupId>org.springframework.security</groupId>
		    <artifactId>spring-security-config</artifactId>
		    <version>5.0.7.RELEASE</version>
		</dependency>

		<!-- 스프링 시큐리티 일반 기능 -->
		<!-- https://mvnrepository.com/artifact/org.springframework.security/spring-security-core -->
		<dependency>
		    <groupId>org.springframework.security</groupId>
		    <artifactId>spring-security-core</artifactId>
		    <version>5.0.7.RELEASE</version>
		</dependency>

		<!-- 스프링 시큐리티와 태그라이브러리를 연결해줌 -->
		<!-- https://mvnrepository.com/artifact/org.springframework.security/spring-security-taglibs -->
		<dependency>
		    <groupId>org.springframework.security</groupId>
		    <artifactId>spring-security-taglibs</artifactId>
		    <version>5.0.7.RELEASE</version>
		</dependency>

		<!-- 스프링 시큐리티 라이브러리 의존관계 정의 시작 -->
web.xml
root-context.xml의 </context-param> 안을 변경 (스프링 시큐리티 설정 파일 지정 후)
	<!-- The definition of the Root Spring Container shared by all Servlets and Filters -->
	<!-- contextConfigLocation에 스프링 시큐리티 설정 파일을 지정 -->
	<context-param>
		<param-name>contextConfigLocation</param-name>
		<param-value>/WEB-INF/spring/root-context.xml
			/WEB-INF/spring/security-context.xml
		</param-value>
	</context-param>
<%@ page language="java" contentType="text/html; charset=UTF-8"%>
<%@ taglib prefix="c" uri="http://java.sun.com/jsp/jstl/core" %>
<h2>로그인 한 관리자만 접근 가능</h2>
<h3>/notice/register.jsp</h3>
결과 화면1
결과 화면2
결과 화면3
결과 화면4
접근 제한 설정
security-context.xml
<security:http> 안에 추가
		<!-- URI 패턴으로 접근 제한을 설정함 -->
		<!-- URL을 가로챔 -->
		<!-- 누구나 접근 가능 -> 생략 가능 -->
		<security:intercept-url pattern="/board/list" access="permitAll"/> <!-- permitAll : 누구나 접근 가능 -->
		<security:intercept-url pattern="/board/register" access="hasRole('ROLE_MEMBER')" /> <!-- ROLE_MEMBER 권한을 가졌을 때 : 회원만 접근 -->
		<security:intercept-url pattern="/notice/list" access="permitAll" />
		<security:intercept-url pattern="/notice/register" access="hasRole('ROLE_ADMIN')" /> <!-- ROLE_ADMIN 권한을 가졌을 때 : 관리자만 접근 -->
결과 화면5 : localhost/notice/register URL 입력 시 화면
로그인 처리
스프링 시큐리니티 5부터 기본적으로 PasswordEncoder를 지정해야 하는데, 그 이유는 사용자 테이블(USERS)에 비밀번호를 암호화하여 저장해야함.
우리는 우선 비밀번호를 암호화 처리 하지 않았으므로 암호화 하지 않는 PasswordEncoder를 직접 구현하여 지정하기로 함 noop : no option password
security-context.xml </security:authentication-manager> 안에 추가
		<!-- 지정된 아이디와 패스워드로 로그인이 가능하도록 설정함 -->
		<security:authentication-provider> <!-- 인증 제공자 -->
			<security:user-service> <!-- 사용자 설정 -->
				<security:user name="member" password="{noop}1234" authorities="ROLE_MEMBER"/>
				<security:user name="admin" password="{noop}1234" authorities="ROLE_MEMBER,ROLE_ADMIN"/>
			</security:user-service>
		</security:authentication-provider>
결과 화면6-1 : localhost/notice/register ❘ member와 admin으로 로그인 가능
결과 화면6-2
=> 출력 결과
/board/register : admin 접근 o, member 접근 o /notice/register : admin 접근 o, member 접근 x
접근 거부 처리
security-context.xml </security:http> 안에 추가
		<!-- 접근 거부 처리자의 URI를 지정 -->
		<security:access-denied-handler error-page="/accessError"/>
SecurityController.java
package kr.or.ddit.controller;

import org.apache.catalina.authenticator.SpnegoAuthenticator.AuthenticateAction;
import org.springframework.security.core.Authentication;
import org.springframework.stereotype.Controller;
import org.springframework.ui.Model;
import org.springframework.web.bind.annotation.GetMapping;

import lombok.extern.slf4j.Slf4j;

@Slf4j
@Controller
public class SecurityController {

	//인증(Authentication) 거부
	//요청URI : /accessError
	@GetMapping("/accessError")
	public String accessError(Authentication auth, Model model) {
		//인증과 관련된 정보를 확인
		log.info("access Denied : " + auth);

		model.addAttribute("msg", "Access Denied");

		//forwarding : jsp
		return "accessError";
	}
}
accessError.jsp
<%@ page language="java" contentType="text/html; charset=UTF-8"%>
<%@ taglib prefix="c" uri="http://java.sun.com/jsp/jstl/core" %>
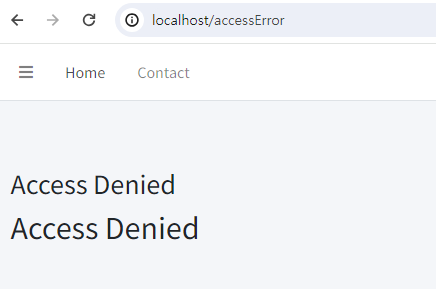
<h3>Access Denied</h3>
<!-- 403 오류가 났을 때 자동으로 발생 후 메시지 출력해줌 (자동) -->
<h2>${SPRING_SECURITY_403_EXCEPTION.getMessage()}</h2>
<h2>${msg}</h2>
결과 화면7-1 : localhost/notice/register 의 권한이 없는 member 로 로그인 진행
결과 화면7-2
사용자 정의 접근 거부 처리자
security-context.xml </security:http> 안에 추가 및 접근 거부 처리자의 URI를 지정 주석처리
		<!-- 접근 거부 처리자의 URI를 지정 -->
<!-- 		<security:access-denied-handler error-page="/accessError"/> -->

		<!-- 등록한 사용자 정의 bean을 접근 거부 처리자로 지정함 -->
		<security:access-denied-handler ref="customAccessDenied"/>

	</security:http>
</beans> 안에 추가
	<!-- CustomAccessDeniedHandler customAccessDenied = new CustomAccessDeniedHandler(); 와 같은 문장임 -->
	<bean id="customAccessDenied"
		class="kr.or.ddit.security.CustomAccessDeniedHandler"></bean>
CustomAccessDeniedHandler.java
package kr.or.ddit.security;

import java.io.IOException;

import javax.servlet.ServletException;
import javax.servlet.http.HttpServletRequest;
import javax.servlet.http.HttpServletResponse;

import org.springframework.security.access.AccessDeniedException;
import org.springframework.security.web.access.AccessDeniedHandler;

import lombok.extern.slf4j.Slf4j;

@Slf4j
public class CustomAccessDeniedHandler implements AccessDeniedHandler{

	@Override
	public void handle(HttpServletRequest request, HttpServletResponse response,
			AccessDeniedException accessDeniedException) throws IOException, ServletException {
		log.info("handle");

		//DB작업
		//로그작업
		//메시지발송

		//redirect : 새로운 URI를 요청
		response.sendRedirect("/accessError");
	}

	/*
	공지사항 등록 화면(/notice/register)은
	일반회원(member/java)이 접근할 수 없는 페이지이고,
	관리자(admin/java)만 접근 가능하므로..
	지정된 접근 거부 처리자(CustomAccessDeniedHander)에서
	접근 거부 처리 페이지(/accessError)로 리다이렉트 시킴
	*/

}
결과 화면8 : localhost/notice/register ❘ 아이디 : member 비밀번호 : 1234로 로그인 시 화면
결과 화면9 : 접근 거부 처리 컨트롤러로 갔다는 것을 확인할 수 있음
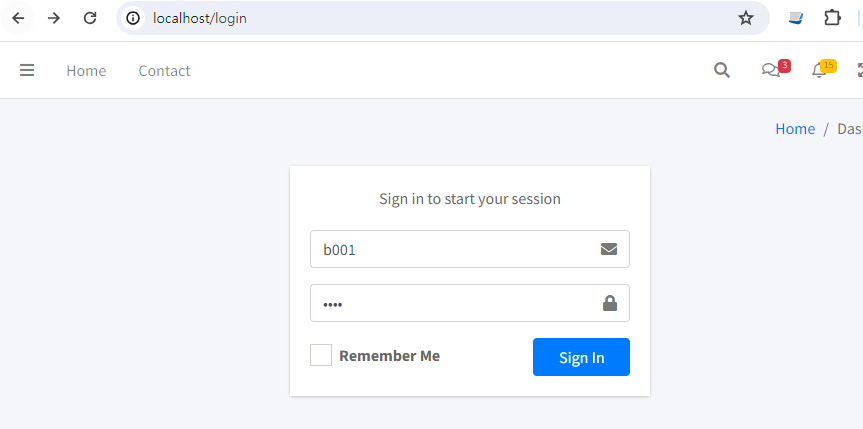
사용자 정의 로그인 페이지
security-context.xml
</security:http> 안에 수정 및 추가
<!-- 폼 기반 인증 기능을 사용 -->
<!-- <security:form-login/> -->

<!-- 사용자가 정의한 로그인 페이지의 URI를 지정함 -->
<security:form-login login-page="/login"/>
LoginController.java
package kr.or.ddit.controller;

import org.springframework.stereotype.Controller;
import org.springframework.web.bind.annotation.GetMapping;

@Controller
public class LoginController {

	@GetMapping("/login")
	public String loginForm() {
		//forwarding : jsp
		// /views/ + loginForm + ".jsp";
		return "loginForm";
	}
}