jQuery (23)

반응형


스타일 시트 관련 메소드


메소드 설 명
css(name) 매치되는 첫 번째 요소의 스타일의 속성을 반환
ex) $(this).css(‘color’)
css(name, value) 매치되는 모든 요소들의 단일 스타일 속성을 설정
ex) $(this).css(‘color’ , ‘red’)
css(propertis) 매치되는 모든 요소들의 스타일 속성에 key : value를 설정
ex) $(this.).css({‘color’ : ’blue’, ‘font-size’ : ’20px’ })
addClass(class) 매치된 요소들의 집합에 지정된 css 클래스를 추가
hasClass(class) 지정된 클래스가 매치된 요소들의  집합 중 최소 한군데 이상 적용 되어 있으면 true를 리턴
removeClass(class) 매치된 요소들의 집합에서 지정된 css 클래스를 삭제 
toggleClass(class) 매치된 요소들에 지정된 클래스가 적용되지 않았다면 적용하고,  이미 적용되어 있다면  제거 


  • css, addClass
<!DOCTYPE html>
<html lang="en">
<head>
    <meta charset="UTF-8">
    <title>Document</title>
<style>
img {
  width: 200px;
  height: 200px;
}
.clrLime {
  color: lime;
}
.bgPurple 
{
  background-color: purple;
}
brdOlive {
  border: 2px dashed olive;
  border-radius: 10px;
}
</style>
</head>
<body>
    <div>
        <input type="button" id="btn" value="확인">

        <p>click!</p>
        <p>click!</p>
        <p>click!</p>
        <p>click!</p>

        <div></div>

        <div id="imgBox">
            <img src="../images/mang13.gif" alt="mang13">
            <img src="../images/mang10.gif" alt="mang10">
        </div>
    </div>

<script src="https://ajax.googleapis.com/ajax/libs/jquery/3.6.1/jquery.min.js"></script>
<script>
  $('#btn').on('click',function(){
    // $('p').css('color', 'red'); // css()의 우선순위가 더 높아 아래의 코드가 적용되지 않음
    $('p').addClass('clrLime'); // 효율적이며 유지보수성이 높음

  });
</script>
</body>
</html>


결과 화면1-1 : 확인 버튼 클릭 시


결과 화면1-2 : 확인 버튼 클릭 시 + 주석 풀었을 시


<!DOCTYPE html>
<html lang="en">
<head>
    <meta charset="UTF-8">
    <title>Document</title>
<style>
img {
  width: 200px;
  height: 200px;
}
.clrLime {
  color: lime;
}
.bgPurple 
{
  background-color: purple;
}
brdOlive {
  border: 2px dashed olive;
  border-radius: 10px;
}
</style>
</head>
<body>
    <div>
        <p>click!</p>
        <p>click!</p>
        <p>click!</p>
        <p>click!</p>

        <div></div>

        <div id="imgBox">
            <img src="../images/mang13.gif" alt="mang13">
            <img src="../images/mang10.gif" alt="mang10">
        </div>
    </div>

<script src="https://ajax.googleapis.com/ajax/libs/jquery/3.6.1/jquery.min.js"></script>
<script>
  $('p').on('click',function(){
    $(this).addClass('bgPurple');
  });
</script>
</body>
</html>


결과 화면2 : 글자 클릭시


  • hasClass, removeClass
<!DOCTYPE html>
<html lang="en">
<head>
    <meta charset="UTF-8">
    <title>Document</title>
<style>
img {
  width: 200px;
  height: 200px;
}
.clrLime {
  color: lime;
}
.bgPurple 
{
  background-color: purple;
}
.brdOlive {
  border: 2px dashed olive;
  border-radius: 10px;
}
</style>
</head>
<body>
    <div>
        <p>click!</p>
        <p>click!</p>
        <p>click!</p>
        <p>click!</p>

        <div></div>

        <div id="imgBox">
            <img src="../images/mang13.gif" alt="mang13">
            <img src="../images/mang10.gif" alt="mang10">
        </div>
    </div>

<script src="https://ajax.googleapis.com/ajax/libs/jquery/3.6.1/jquery.min.js"></script>
<script>

  $('p').on('click',function(){
    if( $(this).hasClass('brdOlive') ) {
      // 클래스 제거
      $(this).removeClass('brdOlive');
    } else {
      // 클래스 추가
      $(this).addClass('brdOlive');
    }
  });
</script>
</body>
</html>


결과 화면3


  • toggleClass
<!DOCTYPE html>
<html lang="en">
<head>
    <meta charset="UTF-8">
    <title>Document</title>
<style>
img {
  width: 200px;
  height: 200px;
}
.clrLime {
  color: lime;
}
.bgPurple 
{
  background-color: purple;
}
.brdOlive {
  border: 2px dashed olive;
  border-radius: 10px;
}
</style>
</head>
<body>
    <div>
        <p>click!</p>
        <p>click!</p>
        <p>click!</p>
        <p>click!</p>

        <div></div>

        <div id="imgBox">
            <img src="../images/mang13.gif" alt="mang13">
            <img src="../images/mang10.gif" alt="mang10">
        </div>
    </div>

<script src="https://ajax.googleapis.com/ajax/libs/jquery/3.6.1/jquery.min.js"></script>
<script>
  $('p').on('click',function(){
    $(this).toggleClass('bgPurple');
  });
</script>
</body>
</html>


결과 화면4 : 글자 다시 클릭 시 적용된 효과 사라짐


  • mouseover, mouseout
<!DOCTYPE html>
<html lang="en">
<head>
    <meta charset="UTF-8">
    <title>Document</title>
<style>
img {
  width: 200px;
  height: 200px;
}
div:empty {
  padding: 10px;
  margin: 10px;
  border: 1px solid lightgray;
}
.clrLime {
  color: lime;
}
.bgPurple 
{
  background-color: purple;
}
.brdOlive {
  border: 2px dashed olive;
  border-radius: 10px;
}
</style>
</head>
<body>
    <div>
        <p>click!</p>
        <p>click!</p>
        <p>click!</p>
        <p>click!</p>

        <div></div>

        <div id="imgBox">
            <img src="../images/mang13.gif" alt="mang13">
            <img src="../images/mang10.gif" alt="mang10">
        </div>
    </div>

<script src="https://ajax.googleapis.com/ajax/libs/jquery/3.6.1/jquery.min.js"></script>
<script>
  // jQuery방식 이벤트 적용방식1 on()
  // jQuery방식 이벤트 적용방식2 event(fnc)
  $('div:empty').on('mouseover', function(){
    $(this).addClass('bgPurple');
  });
  $('div:empty').on('mouseout', function(){
    $(this).removeClass('bgPurple');
  });
</script>
</body>
</html>


결과 화면5 : 마우스를 가져다댈시 색상 변경, 때면 색 사라짐


=> hover 이벤트 사용

<!DOCTYPE html>
<html lang="en">
<head>
    <meta charset="UTF-8">
    <title>Document</title>
<style>
img {
  width: 200px;
  height: 200px;
}
div:empty {
  padding: 10px;
  margin: 10px;
  border: 1px solid lightgray;
}
.clrLime {
  color: lime;
}
.bgPurple 
{
  background-color: purple;
}
.brdOlive {
  border: 2px dashed olive !important;
  border-radius: 10px;
}
</style>
</head>
<body>
    <div>
        <p>click!</p>
        <p>click!</p>
        <p>click!</p>
        <p>click!</p>

        <div></div>

        <div id="imgBox">
            <img src="../images/mang13.gif" alt="mang13">
            <img src="../images/mang10.gif" alt="mang10">
        </div>
    </div>

<script src="https://ajax.googleapis.com/ajax/libs/jquery/3.6.1/jquery.min.js"></script>
<script>
  // jQuery방식 이벤트 적용방식1 on()
  // jQuery방식 이벤트 적용방식2 event(fnc)

  // hover이벤트는 on()로 표현불가
  // mouserover and mouseout의 이벤트를 hover이벤트로 처리해줌
  $('div:empty').hover(function(){
    $(this).addClass('bgPurple');
  }, function(){
    $(this).removeClass('bgPurple');
  });

</script>
</body>
</html>


결과 화면6


=> jQuery방식 이벤트 적용방식1 on()

<!DOCTYPE html>
<html lang="en">
<head>
    <meta charset="UTF-8">
    <title>Document</title>
<style>
img {
  width: 200px;
  height: 200px;
}
div:empty {
  padding: 10px;
  margin: 10px;
  border: 1px solid lightgray;
}
.clrLime {
  color: lime;
}
.bgPurple 
{
  background-color: purple;
}
.brdOlive {
  border: 2px dashed olive !important;
  border-radius: 10px;
}
</style>
</head>
<body>
    <div>
        <p>click!</p>
        <p>click!</p>
        <p>click!</p>
        <p>click!</p>

        <div></div>

        <div id="imgBox">
            <img src="../images/mang13.gif" alt="mang13">
            <img src="../images/mang10.gif" alt="mang10">
        </div>
    </div>

<script src="https://ajax.googleapis.com/ajax/libs/jquery/3.6.1/jquery.min.js"></script>
<script>
  $('div:empty').on({mouseover:function(){
    $(this).addClass('brdOlive');
  },mouseout:function(){
    $(this).removeClass('brdOlive');
  }});
</script>
</body>
</html>


결과 화면7 : 마우스로 가져다댈 시 테두리가 변경됨. css의 우선순위로 인해 위에 순위 변경함


=> jQuery방식 이벤트 적용방식2 event(fnc)

<!DOCTYPE html>
<html lang="en">
<head>
    <meta charset="UTF-8">
    <title>Document</title>
<style>
img {
  width: 200px;
  height: 200px;
}
div:empty {
  padding: 10px;
  margin: 10px;
  border: 1px solid lightgray;
}
.clrLime {
  color: lime;
}
.bgPurple 
{
  background-color: purple;
}
.brdOlive {
  border: 2px dashed olive !important;
  border-radius: 10px;
}
</style>
</head>
<body>
    <div>
        <p>click!</p>
        <p>click!</p>
        <p>click!</p>
        <p>click!</p>

        <div></div>

        <div id="imgBox">
            <img src="../images/mang13.gif" alt="mang13">
            <img src="../images/mang10.gif" alt="mang10">
        </div>
    </div>

<script src="https://ajax.googleapis.com/ajax/libs/jquery/3.6.1/jquery.min.js"></script>
<script>
  // mouseover and mouseout
  // mouseenter and mouseleave
  $('div:empty').on({mouseenter:function(){
    $(this).addClass('brdOlive');
  }, mouseleave:function(){
    $(this).removeClass('brdOlive');
  }});
</script>
</body>
</html>


결과 화면8


  • 더블 클릭시 테두리 변경
<!DOCTYPE html>
<html lang="en">
<head>
    <meta charset="UTF-8">
    <title>Document</title>
<style>
img {
  width: 200px;
  height: 200px;
}
div:empty {
  padding: 10px;
  margin: 10px;
  border: 1px solid lightgray;
}
.clrLime {
  color: lime;
}
.bgPurple 
{
  background-color: purple;
}
.brdOlive {
  border: 2px dashed olive !important;
  border-radius: 10px;
}
</style>
</head>
<body>
    <div>
        <p>click!</p>
        <p>click!</p>
        <p>click!</p>
        <p>click!</p>

        <div></div>

        <div id="imgBox">
            <img src="../images/mang13.gif" alt="mang13">
            <img src="../images/mang10.gif" alt="mang10">
        </div>
    </div>

<script src="https://ajax.googleapis.com/ajax/libs/jquery/3.6.1/jquery.min.js"></script>
<script>
  $('img').on('dblclick', function(){
    $(this).toggleClass('brdOlive');
  });
</script>
</body>
</html>


결과 화면9 : 사진 더블 클릭 시 테두리 변경


넓이와 높이 관련 메소드


메소드 설 명
width() 요소의 너비를 설정하거나 반환 (패딩, 테두리 및 여백 제외)
height() 요소의 높이를 설정하거나 반환 (패딩, 테두리 및 여백 제외)
innerWidth() 요소의 너비를 반환 (패딩 포함)
innerHeight 요소의 높이를 반환 (패딩 포함)
outerWidth() 요소의 너비를 반환 (패딩 및 테두리 포함)
outerHeight() 요소의 높이를 반환 (패딩 및 테두리 포함)


<!DOCTYPE html>
<html lang="en">
<head>
    <meta charset="UTF-8">
    <title>Document</title>
<style>
img {
  width: 200px;
  height: 200px;
}
div:empty {
  padding: 10px;
  margin: 10px;
  border: 1px solid lightgray;
}
.clrLime {
  color: lime;
}
.bgPurple 
{
  background-color: purple;
}
.brdOlive {
  border: 2px dashed olive !important;
  border-radius: 10px;
  padding: 10px;
}
</style>
</head>
<body>
    <div>
        <p>click!</p>
        <p>click!</p>
        <p>click!</p>
        <p>click!</p>

        <div></div>

        <div id="imgBox">
            <img src="../images/mang13.gif" alt="mang13">
            <img src="../images/mang10.gif" alt="mang10">
        </div>
    </div>

<script src="https://ajax.googleapis.com/ajax/libs/jquery/3.6.1/jquery.min.js"></script>
<script>
  $('img').on('dblclick', function(){
    $(this).toggleClass('brdOlive');

    console.log( $(this).width() ); // 순수한 컨텐츠 너비값만 반환 200px
    console.log( $(this).innerWidth() ); // 컨텐츠 너비값 + 패딩값 220px
    console.log( $(this).outerWidth() ); // 컨텐츠 너비값 + 패딩 값 + 보더 값 224px
  });

</script>
</body>
</html>


결과 화면10


반응형
반응형


요소 추가 메소드


메소드 설 명
$(selector).
after(content)
선택 요소 뒤에 content 추가
(형제 레벨로 추가) 
$(content).
insertAfter(selector)
content를 selector 뒤에 추가
(after와 동일)

만일, content가 본문에 존재하면 그 요소를 제거
(기존의 위치에서 삭제)한 후 추가한다. (즉, 이동)
$(selector).
before(content)
선택 요소 앞에 content 추가
(형제 레벨로 추가)
$(content).
insertBefore(selector)
insertAfter와 동일
다만, 내부의 처음 위치에 추가


  • title속성 정보로 이미지 생성 후 추가하기 (DOM String 방식)
<!DOCTYPE html>
<html lang="en">
<head>
    <meta charset="UTF-8">
    <title>Document</title>
<style>
p {
  border: 2px ridge burlywood;
  display: inline-block;
}
img {
    width: 300px;
}
</style>
</head>
<body>
    <h4>title속성 정보로 이미지 생성 후 추가하기</h4>
    <p title="mang3.jpg">온천곰</p> <br>
    <p title="mang12.gif">달린곰</p> <br>
    <p title="mang16.gif">집원하곰</p> <br>
    <p title="mang15.gif">발파닥곰</p> <br>

<script src="../js/jquery-3.7.1.min.js"></script>
<script>
    $('p').on('click', function(){
        // 선택된 요소의 title속성을 src정보로
        //              내부 text정보를 alt정보로 활용
        let titleToSrc = $(this).attr('title');
        let txtToAlt = $(this).text();

        console.log(titleToSrc, txtToAlt);

        // JS방식 중 DOM String - 동적 요소 생성
        let v_img = "<img src='../images/" + titleToSrc + "' alt='" + txtToAlt + "'>";
        // appendChild() >> 노드 대상이므로 사용 불가
        // append() >> 화면상에 추가 해주지만 문자 형태로만 적용함 (태그파싱 되지 않은 상태)
        // innerHTML, insertAdjacentHTML()
        // this.innerHTML += v_img;
        this.insertAdjacentHTML('afterend', v_img);

    });
</script>
</body>
</html>


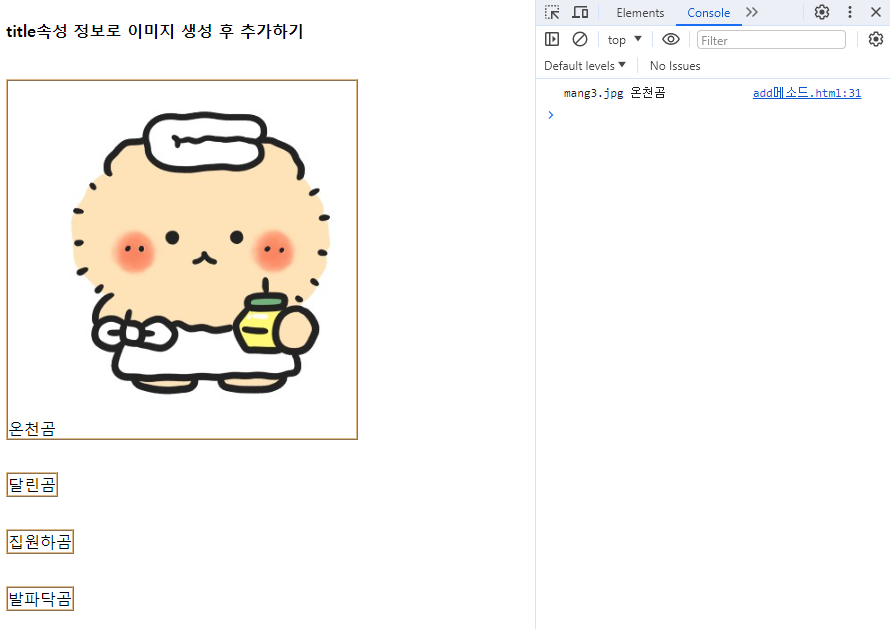
결과 화면1


  • title속성 정보로 이미지 생성 후 추가하기 (메소드 방식)
<!DOCTYPE html>
<html lang="en">
<head>
    <meta charset="UTF-8">
    <title>Document</title>
<style>
p {
  border: 2px ridge burlywood;
  display: inline-block;
}
img {
    width: 300px;
}
</style>
</head>
<body>
    <h4>title속성 정보로 이미지 생성 후 추가하기</h4>
    <p title="mang3.jpg">온천곰</p> <br>
    <p title="mang12.gif">달린곰</p> <br>
    <p title="mang16.gif">집원하곰</p> <br>
    <p title="mang15.gif">발파닥곰</p> <br>

<script src="../js/jquery-3.7.1.min.js"></script>
<script>
    $('p').on('click', function(){
        let titleToSrc = $(this).attr('title');
        let txtToAlt = $(this).text();

        console.log(titleToSrc, txtToAlt);

        // JS방식 중 메소드 사용 - 동적 요소 생성
        let v_img2 = document.createElement('img');
        v_img2.src = "../images/" + titleToSrc;
        v_img2.alt = txtToAlt;
        v_img2.title = 'js동적요소2';
        this.appendChild(v_img2);
    });
</script>
</body>
</html>


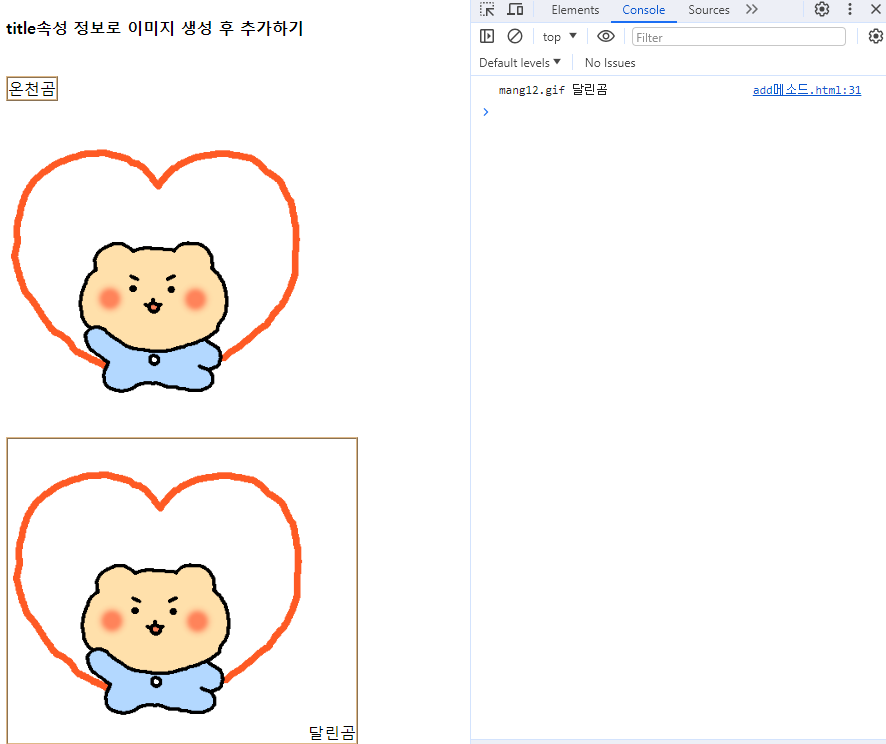
결과 화면2


  • title속성 정보로 이미지 생성 후 추가하기 (jq방식)
<!DOCTYPE html>
<html lang="en">
<head>
    <meta charset="UTF-8">
    <title>Document</title>
<style>
p {
  border: 2px ridge burlywood;
  display: inline-block;
}
img {
    width: 300px;
}
</style>
</head>
<body>
    <h4>title속성 정보로 이미지 생성 후 추가하기</h4>
    <p title="mang3.jpg">온천곰</p> <br>
    <p title="mang12.gif">달린곰</p> <br>
    <p title="mang16.gif">집원하곰</p> <br>
    <p title="mang15.gif">발파닥곰</p> <br>

<script src="../js/jquery-3.7.1.min.js"></script>
<script>
    $('p').on('click', function(){
        // 선택된 요소의 title속성을 src정보로
        //              내부 text정보를 alt정보로 활용
        let titleToSrc = $(this).attr('title');
        let txtToAlt = $(this).text();

        console.log(titleToSrc, txtToAlt);
        
        // jq방식 ($("tag"))
        // append(appendTo), prepend(prependTo), before(insertBefore), after(insertAfter)
        // $('<img src="../images/' + titleToSrc + '" alt="' + txtToAlt + '" title="jq동적요소1">').insertBefore(this);
        $(`<img src="../images/${titleToSrc}" alt="${txtToAlt}" title="jq동적요소1">`).insertBefore(this);
        // 아래와 같은 방식으로도 사용 가능
        
        $(this).prepend($('<img>', {
            src: '../images/' + titleToSrc,
            'alt': txtToAlt,
            "title": 'jq동적요소2'
        }));
    });
</script>
</body>
</html>


결과 화면3


삭제 및 복사 메소드


  • 삭제 메소드
메소드 설 명
$(selector).empty() Selector의 자식 요소를 삭제
$(selector).remove() Selector 및 selector의 자식 요소를 삭제
$(selector).remove(selector1) Selector 중에서 selector1에 해당하는 요소를 삭제
ex) $(‘p’).remove(‘.test’)  <p></p>  <p class=‘test’></p>


  • 복사 메소드
메소드 설 명
$(selector).clone() 선택 요소를 복사하고 선택
$(selector).clone(true/false) 선택 요소의 이벤트 처리기를 포함하여 복사하고 선택


삭제 메소드 예시


<!DOCTYPE html>
<html lang="en">
<head>
    <meta charset="UTF-8">
    <title>Document</title>
<style>
div {
  background-color: gold;
  height: 25px;
}
p {
  border: 3px solid gray;
}
</style>
</head>
<body>
    <button>empty</button>
    <button>remove</button>
    <button>remove(select)</button>

    <div>
        <p>Hello jQuery</p>
    </div>
    <div>
        <p>Hi jQuery</p>
    </div>
    <p>안녕하세요</p>
    <p id="pp">Hi jQuery입니다</p>
    

<script src="../js/jquery-3.7.1.min.js"></script>
<script>
    $(':button').eq(0).on('click', function(){

        $('div').eq(0).empty(); // 디브1번의 자식만 지움

    });

    // 대상 요소 중 두번째 자식인 것
    $('button:nth-child(2)').on('click', function(){
        $('div').eq(1).remove(); // 대상요소(디브2)와 그 자식요소를 모두 지움
    });

    // 대상 요소 타입(button) 중 3번째인 것
    $(':button:nth-of-type(3)').on('click', function(){
        $('p').remove('#pp'); // 모든 p중 특정 조건인 항목만 지움
    });
</script>
</body>
</html>


결과 화면4-1 : empty 예시


결과 화면4-2 : remove 예시


결과 화면4-3 : remove(select) 예시


복사 메소드


<!DOCTYPE html>
<html lang="en">
<head>
    <meta charset="UTF-8">
    <title>Document</title>
</head>
<body>
    <p>인수로 true설정시 이벤트처리기도 함께 복사</p>

<script src="../js/jquery-3.7.1.min.js"></script>
<script>
    $('p').on('click', function(){
        $(this).css('font-size', '+=2px');
    });
</script>
</body>
</html>


결과 화면5 : 글자 선택 시 글자크기가 커짐


<!DOCTYPE html>
<html lang="en">
<head>
    <meta charset="UTF-8">
    <title>Document</title>
</head>
<body>
    <p id="p1">인수로 true설정시 이벤트처리기도 함께 복사</p>
    <button>clone()</button>
    <button>clone(true)</button>

<script src="../js/jquery-3.7.1.min.js"></script>
<script>
    $('p').on('click', function(){
        $(this).css('font-size', '+=1px');
    });

    $('button:nth-of-type(1)').on('click',function(){
        // p요소를 대상으로 복사시 배수로 복사되므로 특정한 요소만 복사대상으로 지정할 필요 있음
        let v_cln = $('#p1').clone(); // 복사
        $('body').append(v_cln); // 붙여넣기
    });

    $('button:nth-of-type(2)').on('click',function(){
        let v_cln2 = $('#p1').clone(true);
        $('body').append(v_cln2);
    });
</script>
</body>
</html>


결과 화면6-1 : 글자 클릭 후 clone()를 클릭 시 커진 글자가 복사됨


결과 화면5-2 :  글자 클릭 후 clone(true)를 클릭 시 커진 글자가 복사됨 => 안에 true를 적지 않으면 생략됨


반응형
반응형


get/set 메소드3


메소드 설 명
prop(property) 속성 값  반환
(존재하지 않으면 undefined반환)
ex) $(“a”).prop(“color”);
prop(property, value) 속성 및 값 설정
ex) $(“a”).prop(“color”, “FF0000”);
prop(property, fn(index,currentvalue)) 함수를 사용해 속성 및 값 설정
prop({property:value, property:value, … }) 여러 속성 및 값 설정
removeProp(properties) 속성 제거
ex) $(“a”).removeProp(“color”);


attr()과 prop() 비교


get/set 체크 됨 체크 안됨
attr('checked') 'checked' undefined
속성에 checked가 없으면 undefined
prop('checked') true false
$(‘:checkbox’).attr(‘checked’, true);
$(‘:checkbox’).prop(‘checked’, true);


  • 현재 상태 값 출력
<!DOCTYPE html>
<html lang="en">
<head>
    <meta charset="UTF-8">
    <title>Document</title>
</head>
<body>
    <h4>요소의 상태 제어(상태 값을 boolean으로 반환받음)</h4>
    <form>
        <input type="checkbox" id="chk" checked>
        <input type="radio" id="rdo">
        <select id="sel">
            <option value="">-</option>
            <option value="1">일</option>
            <option value="2">이</option>
            <option value="3">삼</option>
            <option value="4">사</option>
        </select>
        <input value="가나다" id="txt" readonly> <br><br>

        <input type="button" value="현재 상태 값 출력" id="runBtn">
    </form>

<script src="../js/jquery-3.7.1.min.js"></script>
<script>
    // use strict는 주석을 제외하고 스크립트의 가장 최상단에 배치해야 제 기능을 함
    // "use strict"; // 가장 최신방식의 문법이 적용되었는지 검증하고 가이드 해주는 역할의 문장

    let $chk, $rdo, $sel, $txt;

    $('#runBtn').on('click', function(){
        $chk = $('#chk').prop('checked');
        // $chk1 = $('#chk').attr('checked'); // 속성 존재시 속성 그대로 반환 'checked'
        $rdo = $('#rdo').prop('checked');
        // $rdo1 = $('#rdo').attr('checked'); // 속성 없을 때 undefined 반환
        $sel = $('#sel option').eq(2).prop('selected');
        $txt = $('#txt').prop('readonly');

        console.log("체크>> " + $chk, "라디오>> " + $rdo, "콤보>> " + $sel, "텍스트>> " + $txt);
    });
</script>
</body>
</html>


결과 화면1


  • 반대 상태로 변경
<!DOCTYPE html>
<html lang="en">
<head>
    <meta charset="UTF-8">
    <title>Document</title>
</head>
<body>
    <h4>요소의 상태 제어(상태 값을 boolean으로 반환받음)</h4>
    <form>
        <input type="checkbox" id="chk" checked>
        <input type="radio" id="rdo">
        <select id="sel">
            <option value="">-</option>
            <option value="1">일</option>
            <option value="2">이</option>
            <option value="3">삼</option>
            <option value="4">사</option>
        </select>
        <input value="가나다" id="txt" readonly> <br><br>

        <input type="button" value="반대 상태로 변경" id="chgBtn">
    </form>

<script src="../js/jquery-3.7.1.min.js"></script>
<script>
    // use strict는 주석을 제외하고 스크립트의 가장 최상단에 배치해야 제 기능을 함
    // "use strict"; // 가장 최신방식의 문법이 적용되었는지 검증하고 가이드 해주는 역할의 문장

    let $chk, $rdo, $sel, $txt;

    $('#chgBtn').on('click', function(){
        // $('#chk').prop('checked'); // get

        $('#chk').prop('checked', !$chk); // set
        $('#rdo').prop('checked', !$rdo);
        $('#sel option').eq(2).prop('selected', !$sel);
        $('#txt').prop('readonly', !$txt);
    });

</script>
</body>
</html>


결과 화면2


  • 전체 체크
<!DOCTYPE html>
<html lang="en">
<head>
    <meta charset="UTF-8">
    <title>Document</title>
</head>
<body>
    <h4>요소의 상태 제어(상태 값을 boolean으로 반환받음)</h4>
    
    <input type="checkbox" id="allChk">전체선택 <br>
    <input type="checkbox" class="chk">1 <br>
    <input type="checkbox" class="chk">2 <br>
    <input type="checkbox" class="chk">3 <br>
    <input type="checkbox" class="chk">4 <br>

<script src="../js/jquery-3.7.1.min.js"></script>
<script>
    $('#allChk').on('click', function(){
        let $allChk = $('#allChk').prop('checked'); // get

        // 나머지 1,2,3,4
        $('.chk').prop('checked', $allChk); // set
    });
</script>
</body>
</html>


결과 화면3 : 전체 선택 시 모두 체크됨 but 하나를 뺄 때도 전체선택 되어 있음


<!DOCTYPE html>
<html lang="en">
<head>
    <meta charset="UTF-8">
    <title>Document</title>
</head>
<body>
    <h4>요소의 상태 제어(상태 값을 boolean으로 반환받음)</h4>

    <input type="checkbox" id="allChk">전체선택 <br>
    <input type="checkbox" class="chk">1 <br>
    <input type="checkbox" class="chk">2 <br>
    <input type="checkbox" class="chk">3 <br>
    <input type="checkbox" class="chk">4 <br>

<script src="../js/jquery-3.7.1.min.js"></script>
<script>
    $('#allChk').on('click', function(){
        let $allChk = $('#allChk').prop('checked'); // get

        // 나머지 1,2,3,4
        $('.chk').prop('checked', $allChk); // set
        // 전체선택 요소의 아랫쪽 정보들에 접근
        // $(this).nextAll().prop('checked', $allChk);
        // JQ - Dom접근 메소드 상위요소를 검색하는 parent(), 하위요소 검색 find()
        // $(this).parent().find('.chk').prop('checked', $allChk); // 비효율
    });

    // 전체선택 다음 요소로 제어하기
    $('.chk').on('click', function(){
        console.log( $('.chk').length, $('.chk:checked').length );

        let $chk = $('.chk').length;
        let $choose = $('.chk:checked').length;

        if($chk == $choose) {
            $('#allChk').prop('checked', true);
        } else {
            $('#allChk').prop('checked', false);
        }
    });
</script>
</body>
</html>


결과 화면4


반응형
1 2 3 4 5 6 7 8